SAML
Organisations within Flagsmith can be locked to a single authentication method if required, meaning that accounts can neither be created or logged into with anything other than the method specified. This can be configured at an Organisation level by a Super-Administrator. Please get in touch if you need help with this.
SAML authentication is only available as part of our Enterprise Plans. Please get in touch if this is something you are interested in!
Prerequisites
Enterprise Self Hosted
To configure the SAML integration with Flagsmith self hosted, you must be using an Enterprise licence to self host the Flagsmith application. You should then complete the steps listed here up to and including the line which states ‘Once you've completed these fields, hit the Save button to create the SAML configuration.’
Procedure
To allow an Organisation on the Flagsmith platform to login using SAML authentication, you'll need to access the admin interface. Instructions on how to access the admin interface can be found here.
Once you've logged into the django admin interface, you'll need to click on the 'Saml Configurations' option in the menu on the left. From here, you should see a list of existing SAML configuration entities. To create a new one, click on the 'ADD SAML CONFIGURATION' button in the top right corner of the screen.
You should see a screen similar to the following.
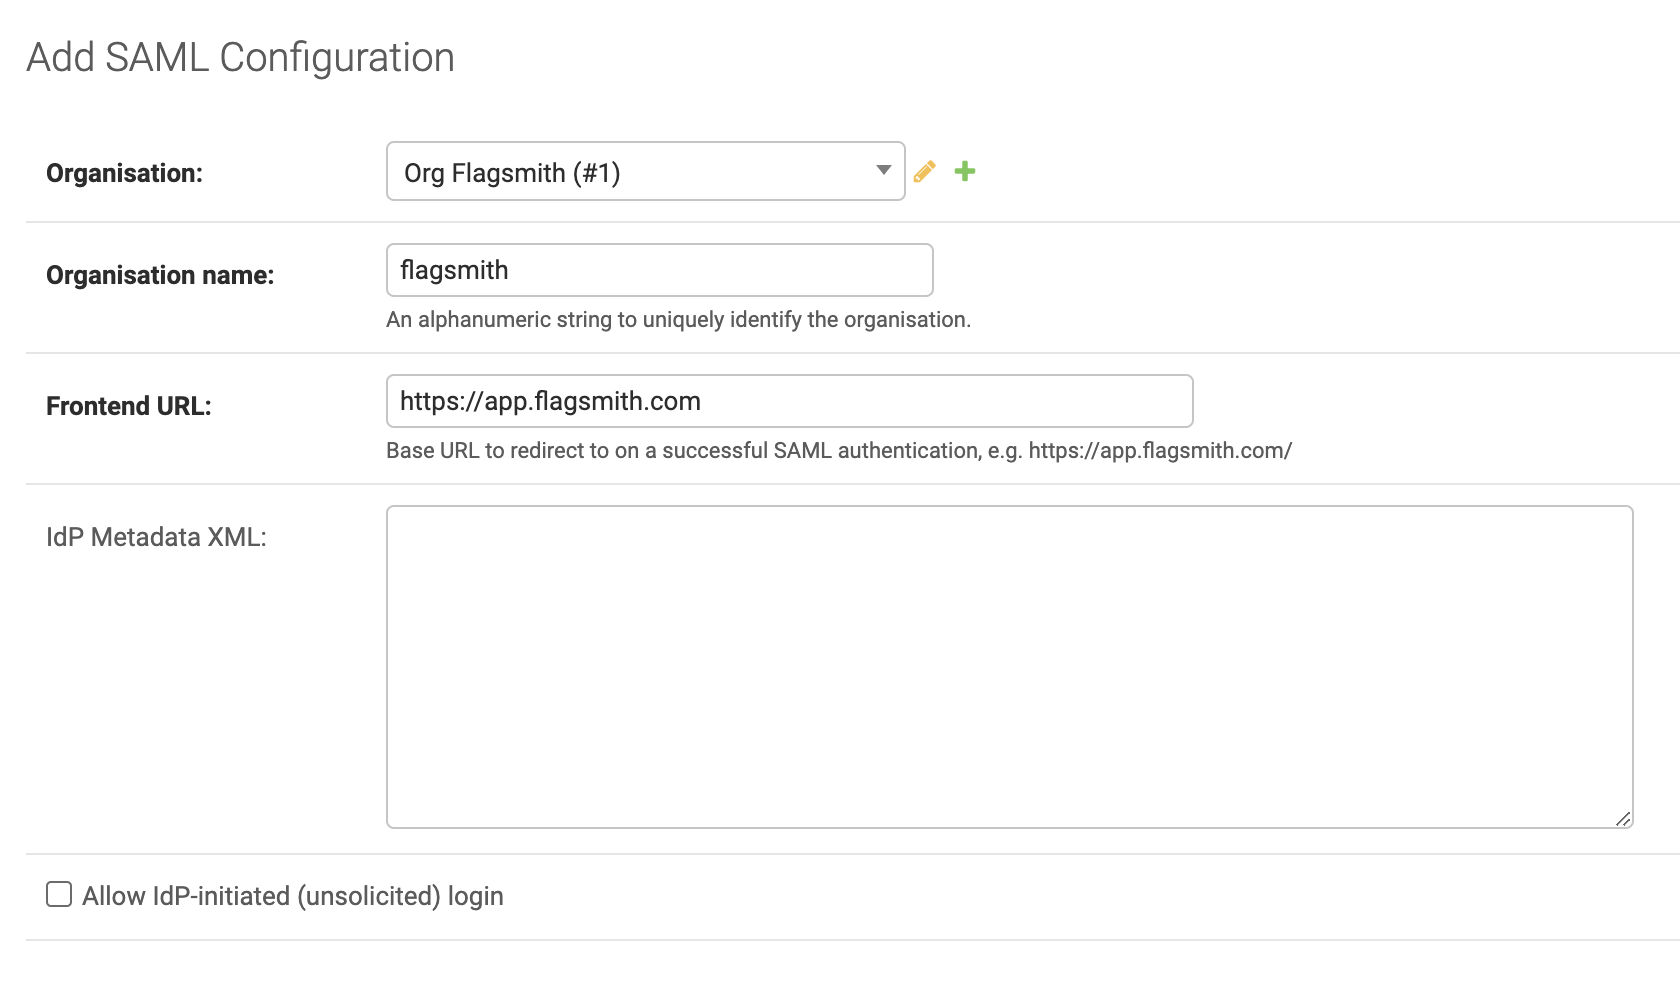
From the drop down next to Organisation, select the organisation in the Flagsmith platform that you want to configure for SAML authentication.
Next to Organisation name, add a name without any spaces that identifies the organisation uniquely for the installation of Flagsmith you're working on. This is what users will provide when authenticating with SAML so that the platform knows where to redirect them.
Next to Frontend url, add in the URL at which your Frontend application is running. This is where users will be redirected to on a successful SAML authentication.
For now, we'll leave Idp metadata xml empty.
If you require the ability to initiate authentication requests from your IdP (IdP initiated), you'll need to check the box next to Allow IdP-initiated (unsolicited) login.
Once you've completed these fields, hit the Save button to create the SAML configuration.
Now, we need to grab the Flagsmith service provider metadata to configure the integration on your IDP. To do this, open
a new browser tab and head to https://<your Flagsmith API>/api/v1/auth/saml/<organisation_name>/metadata/ where
<organisation_name> is the name you provided above. From here, copy and paste what you see in the web page into a new
text file and save that file as flagsmith-sp-metadata.xml or similar.
Note: do not use 'save page as' from your browser as this will likely result in the metadata being incorrect and the integration will not work.
Now you can use this XML metadata to create the integration on your IDP. Once created on the IDP, you can add the IDP metadata into the Idp metadata xml field that we left blank earlier.
Attribute Mapping information
To uniquely identify users, we attempt to retrieve a unique identifier from either the subject-id or uid claim, or
we use the content of the NameID attribute.
We also map the following Flagsmith user attributes to the following claims in the SAML response.
| Flagsmith Attribute | IdP claims |
|---|---|
email | mail, email or emailAddress |
first_name | gn, givenName or (the first part of) displayName |
last_name | sn, surname or (the second part of) displayName |
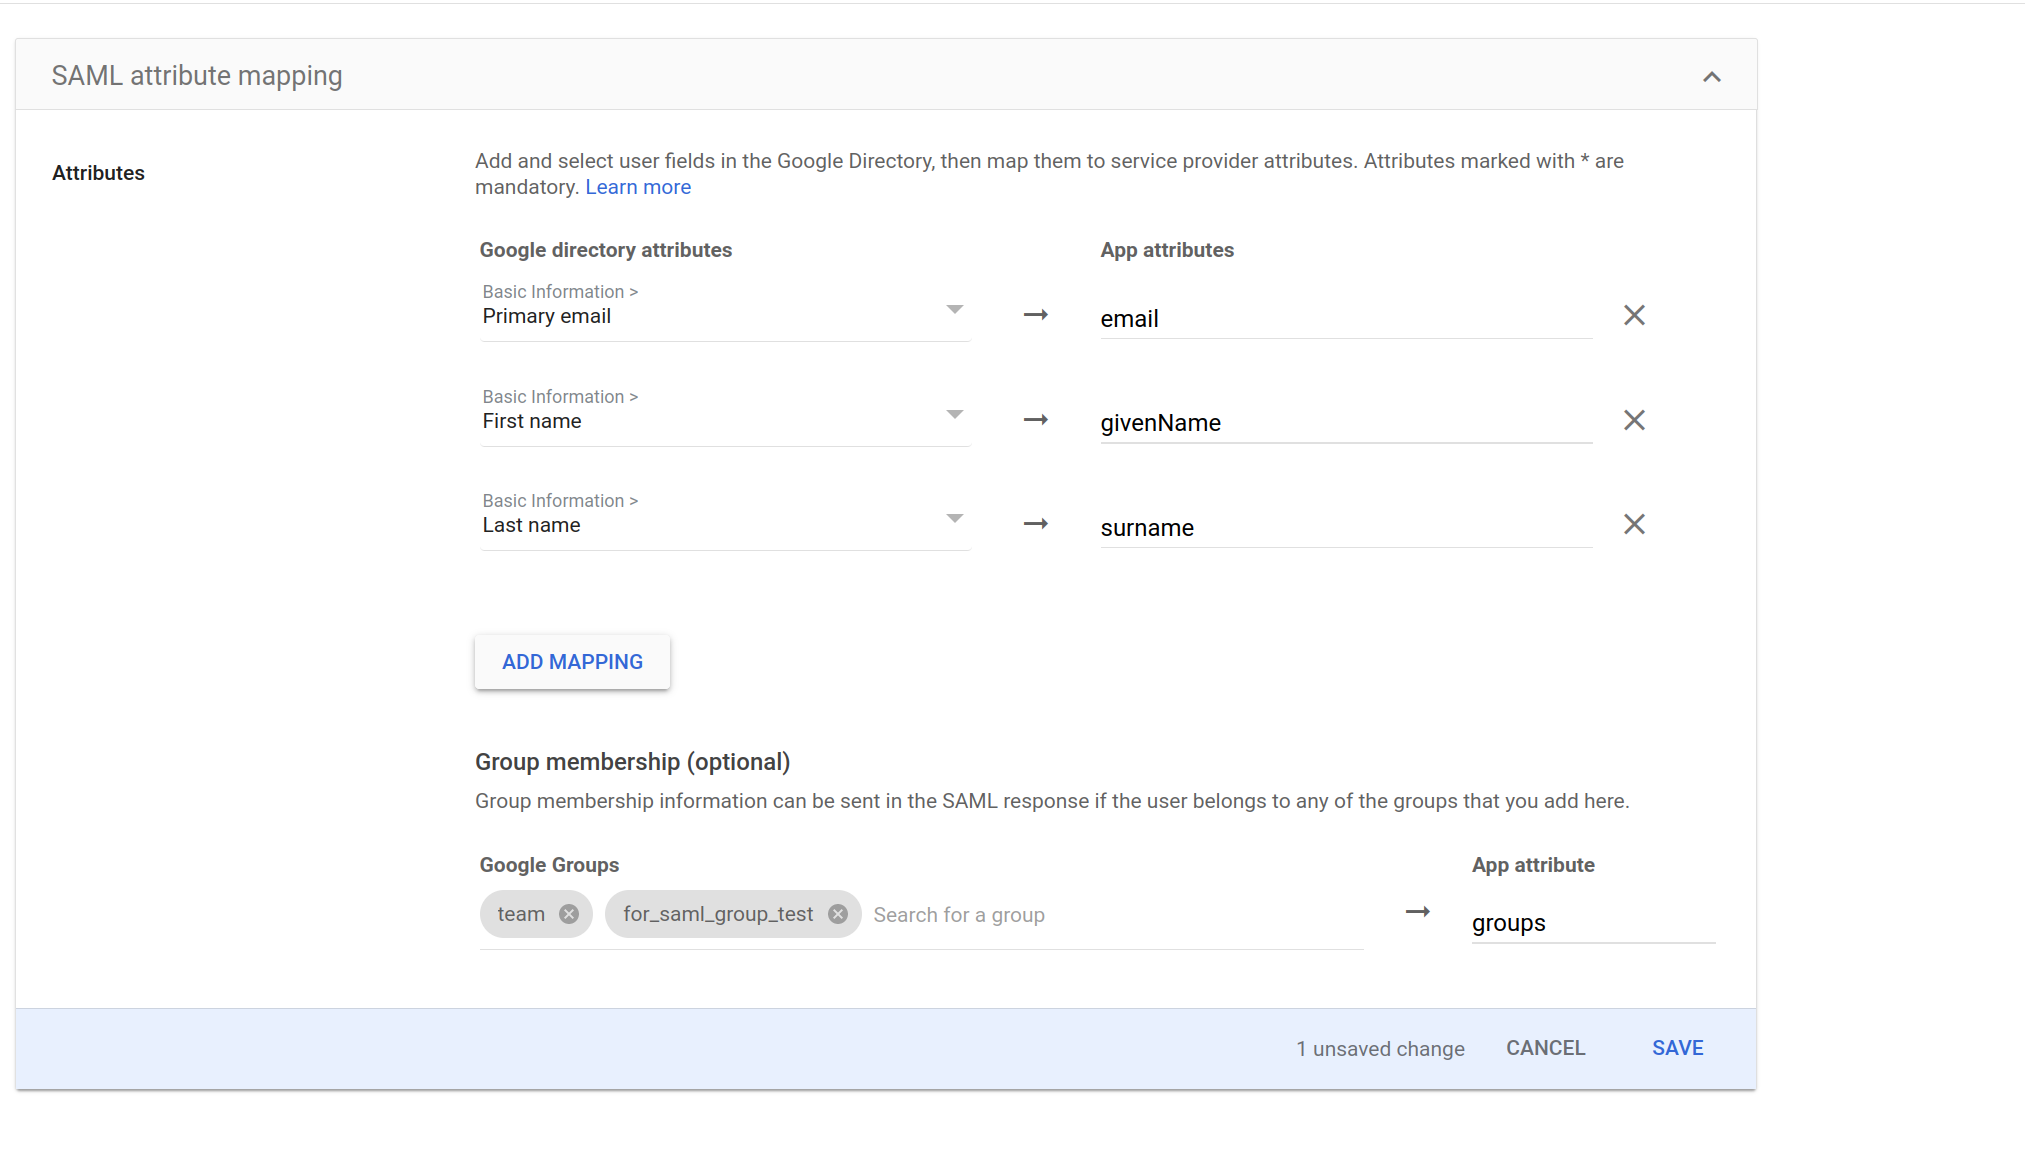
Here's an example configuration from Google's SAML app creation flow.
Group Sync
You can also configure Flagsmith to add or remove a user from a group.